
Originally published in Portuguese on April 6, 2022. Read the original.
I’m making an animated series
That’s why I’m creating a lot of characters — and I always get lost when it’s time to rig one. I wrote this post to help myself, but feel free to read it if it’s useful to you too. So here is my step-by-step for building the next characters.
Step 1: Plan the skeleton
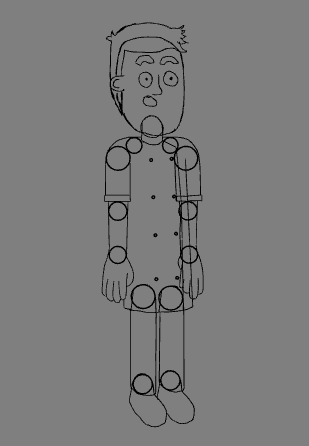
The idea of this sketch is to map where the character’s skeleton joints will be. It makes everything easier later on.
Step 2: Create the color palette
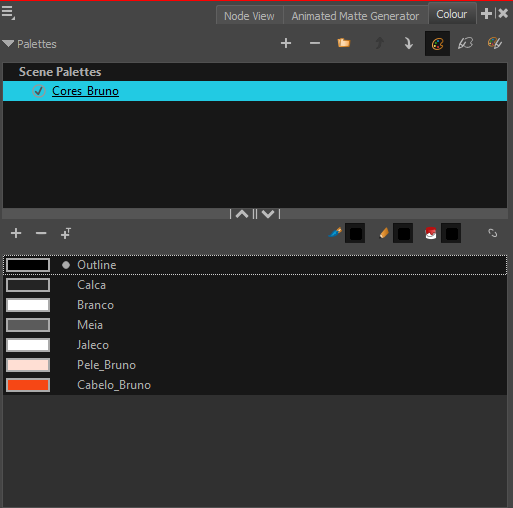
Creating a dedicated palette for each character is important, especially when you work with several of them. Just click “+”, create a new palette and add the colors (keep them well separated, so changing them later is easy).
Step 3: Initial structure
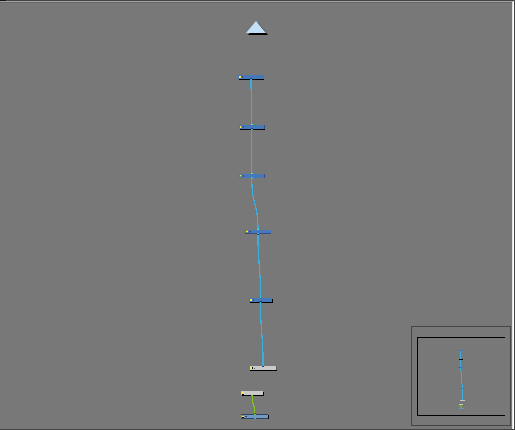
First, create a drawing for the character. Then press (CTRL + R) in the Node View. Select it and press (CTRL + SHIFT + G) to create a group with a composite inside. Then just copy and paste several composites — they will be the organizing skeleton of the rig.
Step 4: Build the first arm
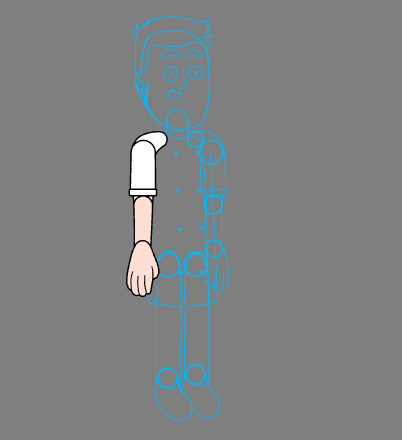
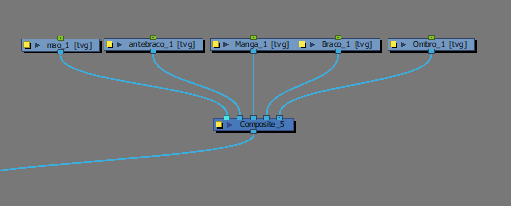
Pretty self-explanatory: draw the first arm with its joints in mind and fill in the colors. No mystery yet. One important thing is to adjust the pivots as you go, so you don’t have to come back and redo everything.
Step 5: Envelope the piece
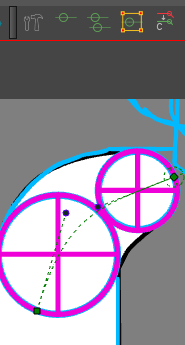
To give the pieces more movement, enveloping is a good solution. Go to Rigging Tool > Envelope Mode and draw the line through the center of the piece, as well as you can.
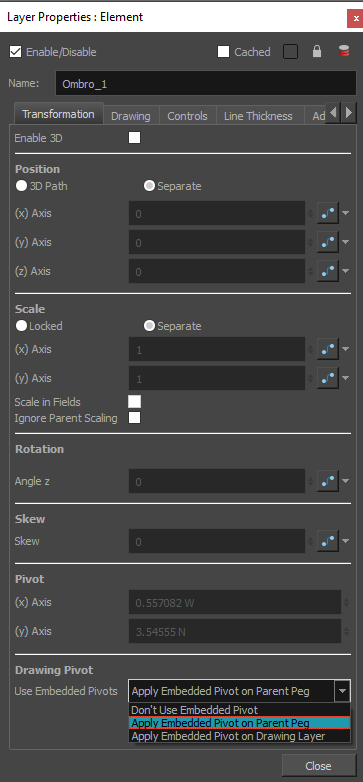
So it doesn’t get disconnected and cause problems later, connect a Peg to the piece and, in its properties, select “Apply Embedded Pivot on Parent Peg”. Finally, adjust the pivot of the new Peg.
Step 6: Apply the Auto-Patch
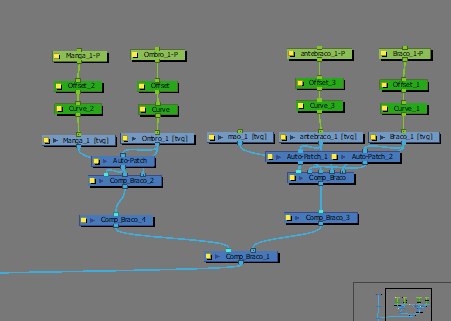
To hide the joint lines we use Auto-Patch. Find the effect in the Node Library and place it between a drawing’s output and the start of the composite, as in the image above. The fill must be on the color layer and the outline on the line layer.
Step 7: Build the hierarchy
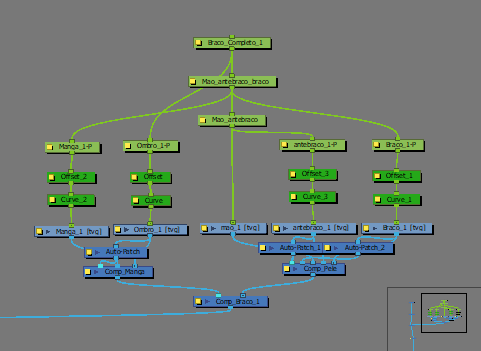
Create new Pegs to build the arm’s hierarchy, from the tip to the center of the body (in this case: hand > forearm > arm > shoulder), always adjusting the anchor point of each new Peg. A handy trick is to copy and paste the anchor point from the pieces you’ve already built.
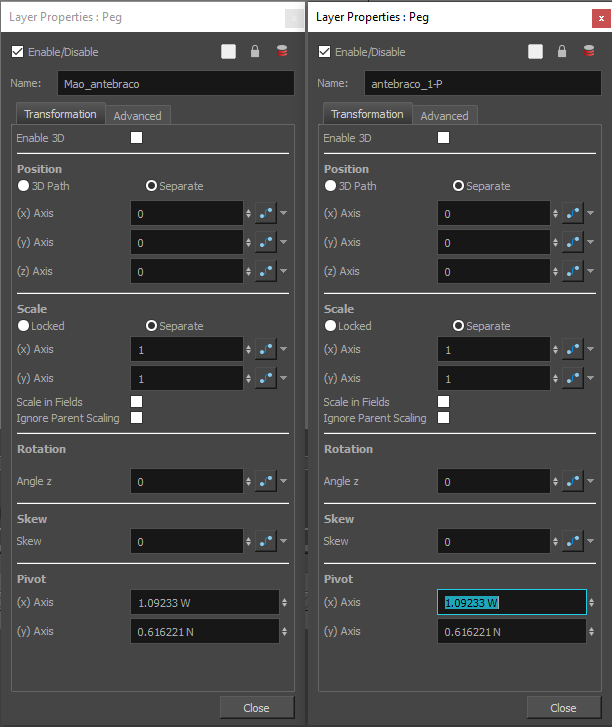
Step 8: Building the torso
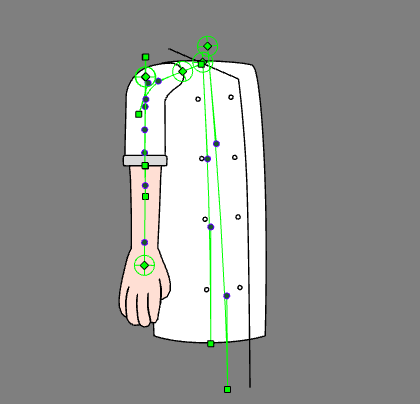
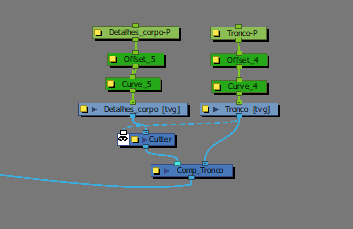
How complex the torso gets depends on each case. For this one I drew a basic shape, enveloped it, placed the anchors where they belong and added one more drawing for the body details.
For more control over the details, I left some extra “padding” and used a mask with the Cutter node from the Node Library.
Step 9: Creating the legs
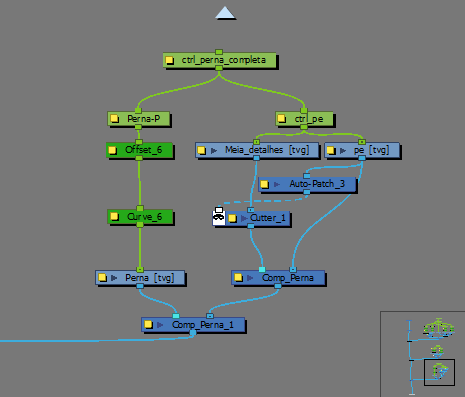
The legs follow almost the same process as the arms: Draw > Envelope > Finish (Auto-Patch) > Build the hierarchy.
My character had a detail on his sock that I made with a Cutter and an Auto-Patch, so the lines wouldn’t disappear. To do that, put the fill of the main piece on the colour layer and an Auto-Patch between it and the details’ Cutter. The image below shows it better:
Step 10: Mirroring the limbs
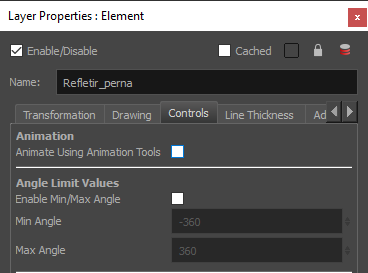
Now that the limbs are ready, it’s time to mirror them. Create a drawing at the top of the limb, open its properties > controls and uncheck “Animate using animation tools”.
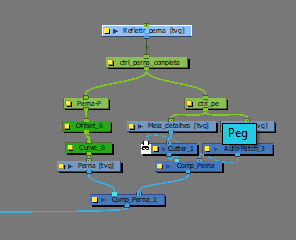
Then select all of the limb’s pieces and go to the options menu in the top-left corner > Nodes > Clone Selected Nodes: Drawings Only.
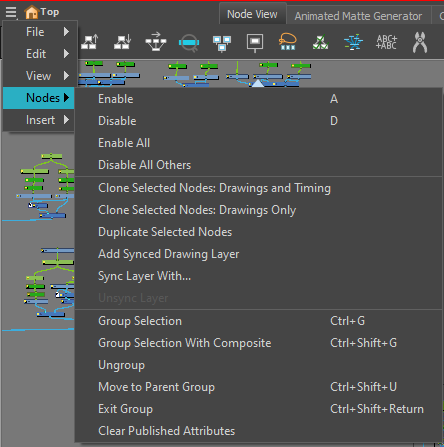
Select the piece, turn on “Animate Off”, press “4” to mirror it and move the limb to the right place.
Step 11: Time for the head
The head has no mystery either: create the drawings and build the hierarchies just like the other parts. The trickiest part here is the face — the eyes and mouths. This is the basic shape of the face:
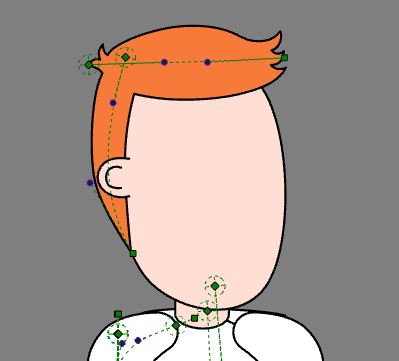
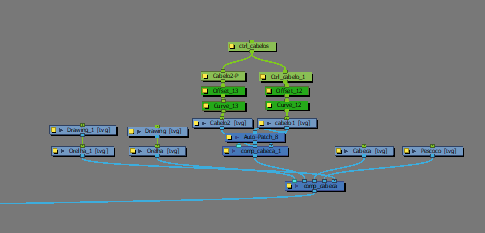
For the face setup I reused another character I had made, which saved me some work since I’m short on time. In the future I’ll write a guide on building eye, mouth and hand libraries.
Step 12: A few details
We’re almost done. Now it’s time to adjust the Auto-Patches where the limbs meet the body. You may need to rearrange a few things in the Node Library.
Adjustments needed:
- put an Auto-Patch of the body in front of everything, plus an Overlay for a cleaner finish
- for the front arm, create a small round joint
Step 13: Hierarchy order
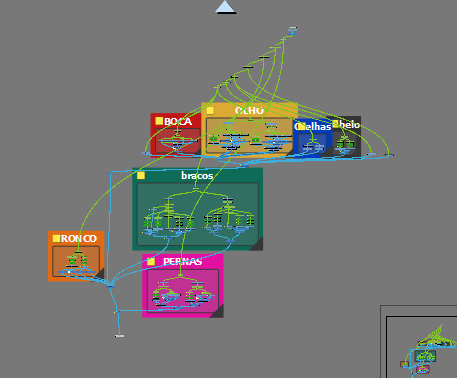
Now create all the Pegs. What to group together:
- Face: eyes, nose, mouth;
- Head: face, skull and hair;
- Neck + head;
- Neck + head + arms;
- Upper body (everything above plus the torso);
- Master (everything).
- Add a Multiport_in to the master.
- In the character’s composite, add a Peg for global control.
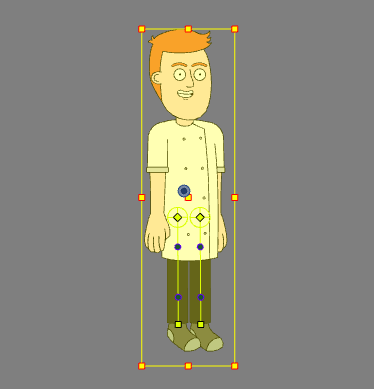
Step 14: Create the template
Now copy the complete composite together with its Peg and paste it into the templates folder, after enabling “Right to modify” (right-click the locked folder inside the Library).
Then build the Master Controllers — and you’re done!